从 Capacitor 3 升级至 Capacitor 4
与之前的升级相比,Capacitor 3 和 4 之间的破坏性变更相当少。在本指南中,你将找到将项目升级到当前 Capacitor 4 版本的步骤,以及我们官方插件的破坏性变更列表。
使用 CLI 进行迁移
使用 npm i -D @capacitor/cli@latest-4 将最新版本的 Capacitor CLI 安装到你的项目中。安装完成后,只需运行 npx cap migrate 即可让 CLI 为你处理迁移。如果迁移的任何步骤无法完成,终端输出中会提供更多信息。下面列出了手动进行迁移的步骤。
iOS
以下指南描述了如何将你的 Capacitor 3 iOS 项目升级到 Capacitor 4。
提升 iOS 部署目标
为你的 Xcode 项目执行以下操作:在项目编辑器中选择 Project 并打开 Build Settings 标签页。在 Deployment 部分,将 iOS Deployment Target 改为 iOS 13.0。对任何应用 Targets 重复相同的步骤。
然后,打开 ios/App/Podfile 并按照以下步骤操作:
- 在第一行添加:
require_relative '../../node_modules/@capacitor/ios/scripts/pods_helpers'
- 将 iOS 版本更新为 13.0:
platform :ios, '13.0'
- 在最后一行添加以下代码块:
post_install do |installer|
  assertDeploymentTarget(installer)
end
移除不必要的代码
从 AppDelegate.swift 中移除未使用的 touchesBegan 方法
-override func touchesBegan(_ touches: Set<UITouch>, with event: UIEvent?) {
-  super.touchesBegan(touches, with: event)
-
-  let statusBarRect = UIApplication.shared.statusBarFrame
-  guard let touchPoint = event?.allTouches?.first?.location(in: self.window) else { return }
-
-  if statusBarRect.contains(touchPoint) {
-      NotificationCenter.default.post(name: .capacitorStatusBarTapped, object: nil)
-  }
-}
可选:从 Info.plist 中移除 NSAppTransportSecurity 条目
NSAppTransportSecurity 仅用于实时重载,�如果你不使用实时重载或使用 Ionic CLI 进行实时重载,则不再需要此条目。
-<key>NSAppTransportSecurity</key>
-<dict>
-		  <key>NSAllowsArbitraryLoads</key>
-  		<true/>
-</dict>
Android
以下指南描述了如何将你的 Capacitor 3 Android 项目升级到 Capacitor 4。
更新 Android 项目变量
在你的 variables.gradle 文件中,将值更新为以下新的最低要求,并添加新的 coreSplashScreenVersion 和 androidxWebkitVersion
minSdkVersion = 22
compileSdkVersion = 32
targetSdkVersion = 32
androidxActivityVersion = '1.4.0'
androidxAppCompatVersion = '1.4.2'
androidxCoordinatorLayoutVersion = '1.2.0'
androidxCoreVersion = '1.8.0'
androidxFragmentVersion = '1.4.1'
coreSplashScreenVersion = '1.0.0-rc01'
androidxWebkitVersion = '1.4.0'
junitVersion = '4.13.2'
androidxJunitVersion = '1.1.3'
androidxEspressoCoreVersion = '3.4.0'
cordovaAndroidVersion = '10.1.1'
向 Android Manifest 添加 android:exported 标签
在你的 AndroidManifest.xml 文件中,需要向 <activity> 标签添加以下行。
android:exported="true"
此标签确保你可以在应用中打开此 "Activity" 或屏幕。有关此标签和其他标签的更多信息,请查看 Android 的 <activity> 参考文档。
默认情况下,你的 AndroidManifest.xml 位于 android/app/src/main/AndroidManifest.xml。
更新 Gradle Google Services 插件
在 android/build.gradle 文件中,将 classpath 'com.google.gms:google-services:4.3.5' 更改为 classpath 'com.google.gms:google-services:4.3.13' 以更新 Google Services 插件。
更新至 Gradle 7
在 文件 > 项目结构 > 项目 中调整 Gradle 项目设置。Android Gradle 插件版本应为 7.2.1 或更高,Gradle 版本应为 7.4.2 或更高。应用这些更改并通过单击 Android Studio 右上角的大象图标运行 gradle 同步。
Android Studio 可能会提供自动迁移到 Gradle 7 的选项。接受这个提议即可!要升级,请转到你的 build.gradle 文件,单击 💡 图标,然后单击 "Upgrade Gradle"。项目迁移完成后,如上所述运行 gradle 同步。
另一种替代方法是使用 Android Gradle 插件升级助手来为你处理迁移。此工具的步骤可在 Android 文档 中找到。
确保使用 Java 11
Capacitor 3 同时兼容 Java 8 和 Java 11。从今往后,Capacitor 4 将仅支持 Java 11。你可以通过以下菜单在 Android Studio 中更改此设置:
偏好设置 > 构建、执行、部署 > 构建工具 > Gradle
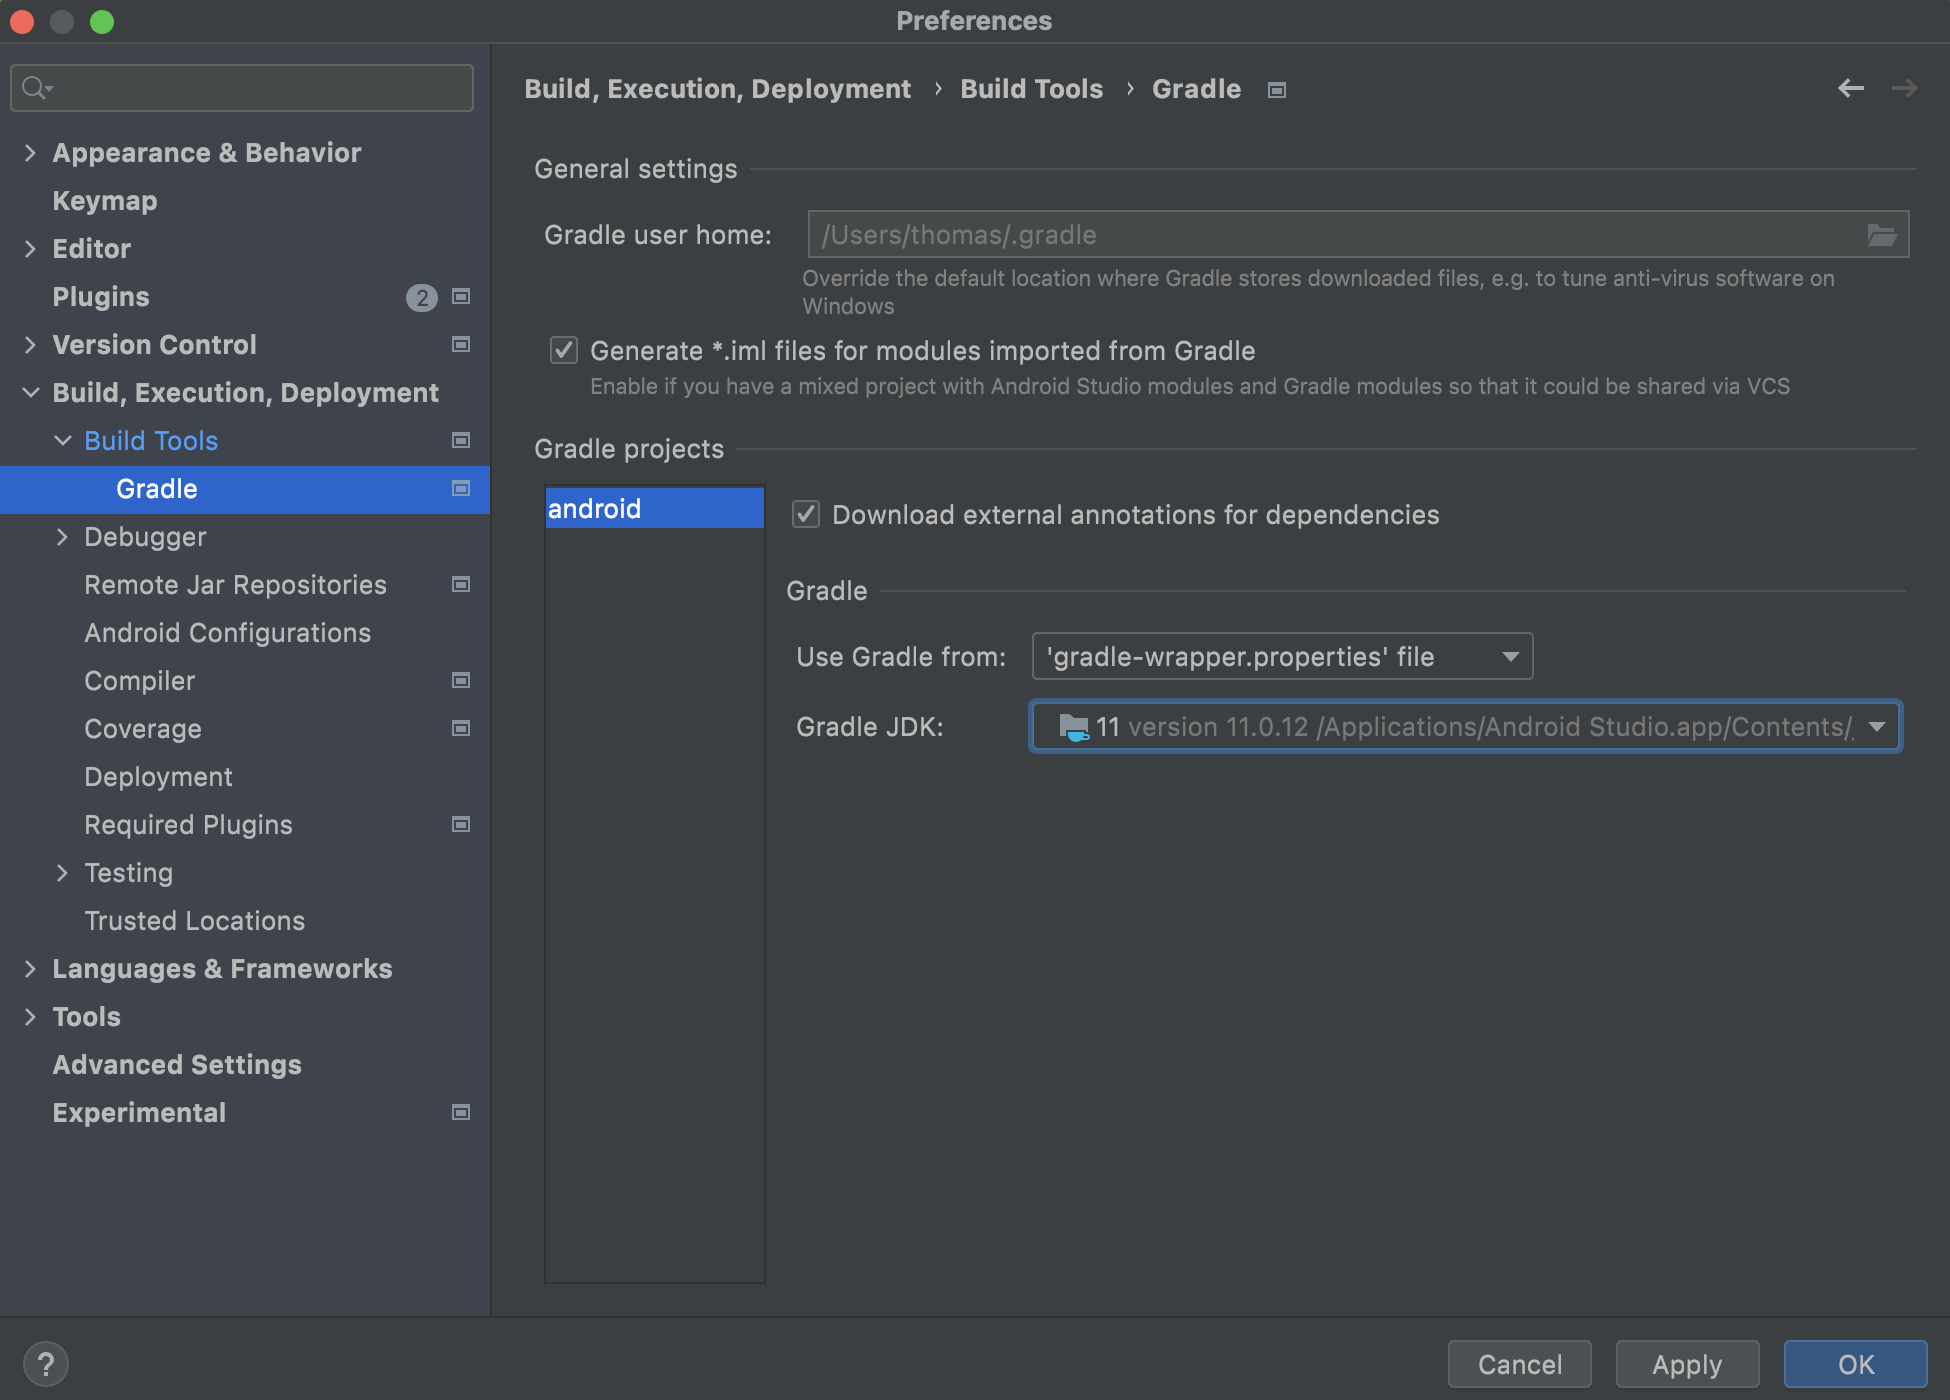
在那里,你可以将 "Gradle JDK" 修改为 Java 11。
Java 11 随最新版本的 Android Studio 一起提供。无需额外下载!
切换到自动加载 Android 插件
这在 Capacitor 3 中是一个可选更改,但由于初始化方法已被移除,现在升级到 Capacitor 4 时变为强制要求。在 MainActivity.java 中,可以移除 onCreate 方法。当添加或移除通过 npm 安装的插件时,你不再需要编辑此文件。
 public class MainActivity extends BridgeActivity {
-    @Override
-    public void onCreate(Bundle savedInstanceState) {
-        super.onCreate(savedInstanceState);
-
-        // 初始化 Bridge
-        this.init(savedInstanceState, new ArrayList<Class<? extends Plugin>>() {{
-            // 已安装的额外插件放在这里
-            add(Plugin1.class);
-            add(Plugin2.class);
-        }});
-    }
 }
更改 registerPlugin 的顺序
如果你的应用包含专门为你的应用程序构建的自定义插件,必须在 super.onCreate 之前注册它们:
 public class MainActivity extends BridgeActivity {
     @Override
     public void onCreate(Bundle savedInstanceState) {
+        registerPlugin(PluginInMyApp.class);
         super.onCreate(savedInstanceState);
-        registerPlugin(PluginInMyApp.class);
     }
 }
可选:使用新的 Android 12 启动屏 API
要启用新的推荐 Android 12 启动屏 API,需要进行以下更改:
- 在
android/app/src/main/res/values/styles.xml中,将AppTheme.NoActionBarLaunch主题的parent属性从AppTheme.NoActionBar更改为Theme.SplashScreen,并向主题添加所需的选项。
<style name="AppTheme.NoActionBarLaunch" parent="Theme.SplashScreen">
    <item name="android:background">@drawable/splash</item>
</style>
不启用 Android 12 启动屏将导致 Android 12+ 设备上出现双重启动屏,并在旧设备上使用旧的启动屏。
此更改是可选的,但建议进行,以防止 Android Studio 在上次更改后显示 Cannot resolve symbol 'Theme.SplashScreen' 消息。
- 在
android/app/build.gradle的依赖项部分添加implementation "androidx.core:core-splashscreen:$coreSplashScreenVersion"。### 可选:使用 DayNight 主题
要基于用户的设备主题自动切换(深色/浅色主题),请在 android/app/src/main/res/values/styles.xml 中,将 <style name="AppTheme.NoActionBar" parent="Theme.AppCompat.NoActionBar"> 更改为 <style name="AppTheme.NoActionBar" parent="Theme.AppCompat.DayNight.NoActionBar">。
可选:从 Gradle 文件中移除 jcenter()
在之前的 Capacitor 版本中,由于我们的 Cordova 兼容层托管在 Jcenter 上,因此需要 jcenter()。但现在我们使用了托管在 Maven Central 上的最新 Cordova Android 版本。这样一来,你可能可以完全从 build.gradle 文件中移除 jcenter()。如果你使用了其他插件或原生依赖项,请在移除前确保它们没有托管在 Jcenter 上!
插件
以下插件功能已被修改或移除。请相应更新你的代码。
Storage
@capacitor/storage 插件已重命名为 @capacitor/preferences,以更好地反映其用途。API 保持不变。
Camera
- 移除了
preserveAspectRatio设置。 - 插件将不再提示缺少 iOS 使用描述。
androidxMaterialVersion变量已更新至1.6.1。androidxExifInterfaceVersion变量已更新至1.3.3。
Action Sheet
ShowActionsOptions.title现在是可选的。androidxMaterialVersion变量已更新至1.6.1。
仅限 iOS
buildActionSheet的标题和消息现在为可选。
Push Notifications
- 为
registrationError事件添加了新类型RegistrationError。 importance现在是可选的。默认值为3。deleteChannel现在只接受频道 ID 而不是整个对象。firebaseMessagingVersion变量已更新至23.0.5。- Android 现在会遵循
presentationOptions配置选项。
Local Notifications
importance现在是可选的。默认值为3。deleteChannel现在只接受频道 ID 而不是整个对象。- Android 12+ 需要权限才能发送精确通知。
App
App.exitApp()现在返回一个 Promise。
Geolocation
getCurrentPosition()现在忽略超时设置。playServicesLocationVersion已更新至20.0.0。- 当应用进入后台状态时,插件现在会停止位置更新。
- 如果系统位置服务被禁用,插件现在会抛出错误。
FileSystem
copy现在返回已复制文件的路径。ReaddirResult现在返回一个FileInfo对象数组,其中除了文件的 URI 外,还包含与每个文件相关的元数据。StatResult已统一,在所有平台上返回相同的内容。
Device
model现在在 iOS 上返回确切的型号(从 "iPhone" 改为 "iPhone13.4")。getLanguageCode()现在在 Web 上返回简短语言代码(与其他平台一致),要获取完整代码,请使用getLanguageTag()。
Dialog
title现在是可选的。
Keyboard
style配置选项现在使用KeyboardStyle枚举来指定选项。
Toast
- 在 Android 12 及更高版本上,所有 Toast 都显示在底部。
Browser
androidxBrowserVersion变量已更新至1.4.0。
Splash Screen
- 如果切换到新的 Android 12 Splash Screen API,大多数配置选项将不适用于初始启动画面,但当调用
show()方法时显示的启动画面仍可用。此外,在 Android 12+ 设备上,初始启动画面与show()方法显示的启动画面不同。